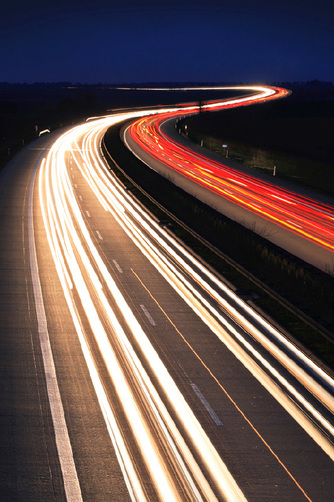
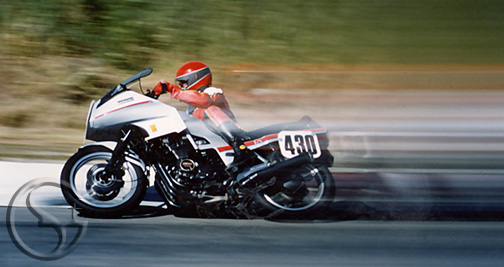
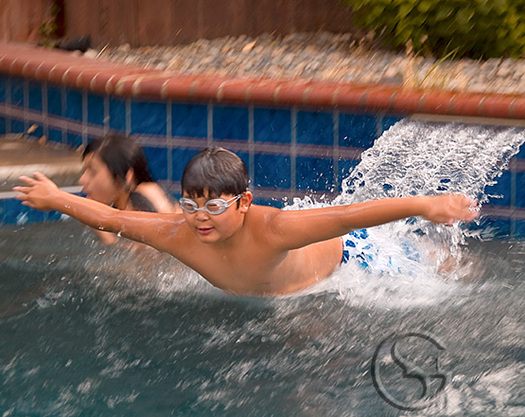
 Motion Capture Photography Photography Tip for June/July 2010 This time of year our lives become so active that most of our photographs tend to be attempts at capturing and/or stopping the motion of summer. We all want that perfect shot for the scrapbook, so I thought it might be fun to discuss some of the ways pros handle this subject. Believe it or not there are various ways to handle motion in photography and they all begin with one question..."what is your goal?" Do you want to stop motion, so you can show off Davey's big dive into the swimming pool? or, do you want the photograph to truly give the viewer a feeling of motion? Here are some tips: Panning to Capture Motion Panning is a technique that with experimentation and practice can give some really exciting results. The general idea is that you pan your camera (and body) to move with the direction your subject is traveling. What you get is a fairly sharp subject that stands out against a blurred background, ultimately giving the desired feeling of motion. You’ll want to begin by choosing a shutter speed of 1/30th, you may find you can get the same results with 1/60th of a second. A shutter speed much slower than that will add camera shake to your results and isn't recommended. Find a spot to shoot that allows you to see the subject for a few seconds BEFORE they go by giving you time to focus in and begin to track them. If your camera does not have the ability to maintain focus of a moving subject, then you may need to pre-focus your shot to the spot you will end up releasing the shutter. You want a smooth follow through when using the panning technique, so continue the pan after you click the shutter so that you are not clipping the motion capture before the camera has recorded it. As I mentioned, panning can be a very frustrating technique to master, so if this sounds like something you would like to make use of, then practice, practice, practice before heading out to capture pictures that are important to you. This is a great way to shoot the kids sports games, pool activities, dog parks, amusement parks and so much more. Stopping Motion Everyone loves those shots when the action has been stopped, especially when your subject is captured in mid-air! Action photography is considered one of the most difficult areas to work in, however the digital camera world has made trying for that perfect shot something everyone can perfect with the ability to get immediate viewing and no film waste. These days, we can just keep shooting from the moment the action starts until it ends. This consecutive shooting combined with the right shutter speed and ISO can make for some fun action shots. The real key to stopping action in photography is to use a fast shutter speed, the higher the number the faster the shutter inside your lens opens and closes to capture the moment. In addition to the shutter speed, your ISO/ASA needs to be fast enough to support the exposure by allowing you to shoot with an aperture of at least f/8 to give you reasonable depth of field while allowing enough light for a pleasing exposure. 1/500th of a second or higher is perfect for most action situations, which leaves the lighting conditions to deal with. Back in the film-based camera days, if you purchased an ISO/ASA 100 film, you would get the best results with a shutter speed of 1/100th of a second, however today’s digital cameras are often more forgiving, so experiment and find out what your camera does best. I suggest you start with a shutter speed of 1/500th of a second, set your ISO to 400 and work with the ISO setting until you can reach an f/stop setting between f/8 and f/22. Out at the pool, beach or park you should be able to stop the action using an ISO of 200 to 400 and the above settings.  Motion Blur Photography Motion Blur is another method used to create the feeling of motion, but is only comes into play when your subject is moving and everything else in the image is still. You can get some wonderful swirls of color, such as this photograph where the lights of the cars have created the curved lines while the road and roadside remains sharp. Simple time-exposures are the trick to this technique. The camera must be on a tripod, and its wise, but not absolutely necessary, to have a remote or cable release (if you do not, you add camera shake to the equation). The length of time your shutter should remain open will depend on the subject. The speed at which cars travel is faster than the speed at which someone walks. The other factor is lighting. Once again you will need to experiment and develop exposures that produce the results you are looking for so that you can use this technique anytime you have the opportunity. A starting point for nighttime exposures would be 1/8th of a second and I would take the same shot going down from there all the way to two or three full seconds. Keep a record and then decide what you like best. There are ways to reduce the light the camera is receiving. In previous posts, we've chatted about the benefits of having a ND Filter (Neutral Density) in your bag of tricks and this is a good tool to shave a couple of f/stops off your exposure. Another trick is to reduce the ISO. Lowering the ISO number will lessen the amount of light the camera sees. So go capture some motion and happy shooting!
2 Comments
7/10/2012 02:22:00 am
I quite delighted to discover this web web site on bing, just what I was searching for : D besides saved to bookmarks .
Reply
Your comment will be posted after it is approved.
Leave a Reply. |
Resources
Here we archive our Photo Tips, Tutorials, Marketing Tips and Preset Downloads from all our sites. ENJOY! Categories
All
My favorite
|


